Symmetrical joints in Maya
As I was rigging my character this afternoon, I came across the following a tutorial on Maya 2014's new joint creation options. The video showed off two awesome features - Joint Projected Centering and Joint Symmetry.
However, I had an issue getting both of the features to work how I wanted them to (I'm using Maya 2017 Student), so here's a quick writeup of my experiences.
Projected Centering
This feature is a huge time saver when placing joints, and makes it possible to place joints without ever leaving the perspective view (i.e, having to use the orthographic views like it's 1999).
However, the tutorial didn't specify that you need to set your character mesh to be on an unlocked layer, otherwise the tool will not work. When rigging, it's common to put your geometry on a reference layer (not doing so is Rigging Cardinal Sin #2). If you don't turn off your reference layer, the projection will fail and the joint will end up somewhere far away in outer space.
Joint Symmetry
This feature is great for symmetrical body parts, like arms, legs, or eyes. The usual workflow is to use the Skeleton > Mirror Joints feature, but any further modifications to either side of the skeleton won't be mirrored, even if you have symmetry turned on! This can be a huge pain if you're setting joint orientations or moving joints after their original placement. That's where the Joint Symmetry feature comes in handy:
While an awesome feature, I found two problems with it for my workflow.
Strangely enough, the symmetryConstraint that is created when using Joint Tool > Symmetry is completely inaccessible from the Maya constraints menu! That means there's no option to create one yourself for existing joints if you forgot to turn on the setting when you created your joints.
Additionally, if you use joint mirroring, all the symmetrical joints will be set up with Behavior style of mirroring - Orientation mirroring is not an option. Here are two quick visuals to understand the difference (you can also read more about Orientation vs. Behavior in the Maya doc page for Mirror Joint):
Behavior mirrored arms (note the reversed local rotation axes)
Behavior mirroring is great for arms, but I personally don't like setting my legs with Behavior style mirroring (local rotation axis reversed) - I prefer Orientation style mirroring (sharing local rotation axis). This means when you rotate a joint, the symmetrical joint will rotate together with it, instead of in the reverse.
Orientation mirrored legs (note the matched local rotation axes)
Scripting to the rescue!
To solve these issues, I created a short mel script. The script has options for setting up symmetry on two existing joints (by selecting them and applying the symmetry):
... and an option to mirror a joint chain, and set up the symmetry as the joints are mirrored. This replaces the typical Skeleton > Mirror Joints menu item:
I have local rotation axes turn on so that you can see that they are mirrored to the opposite side when I rotate the original joint orientations.
Duplicating Symmetrical Joints
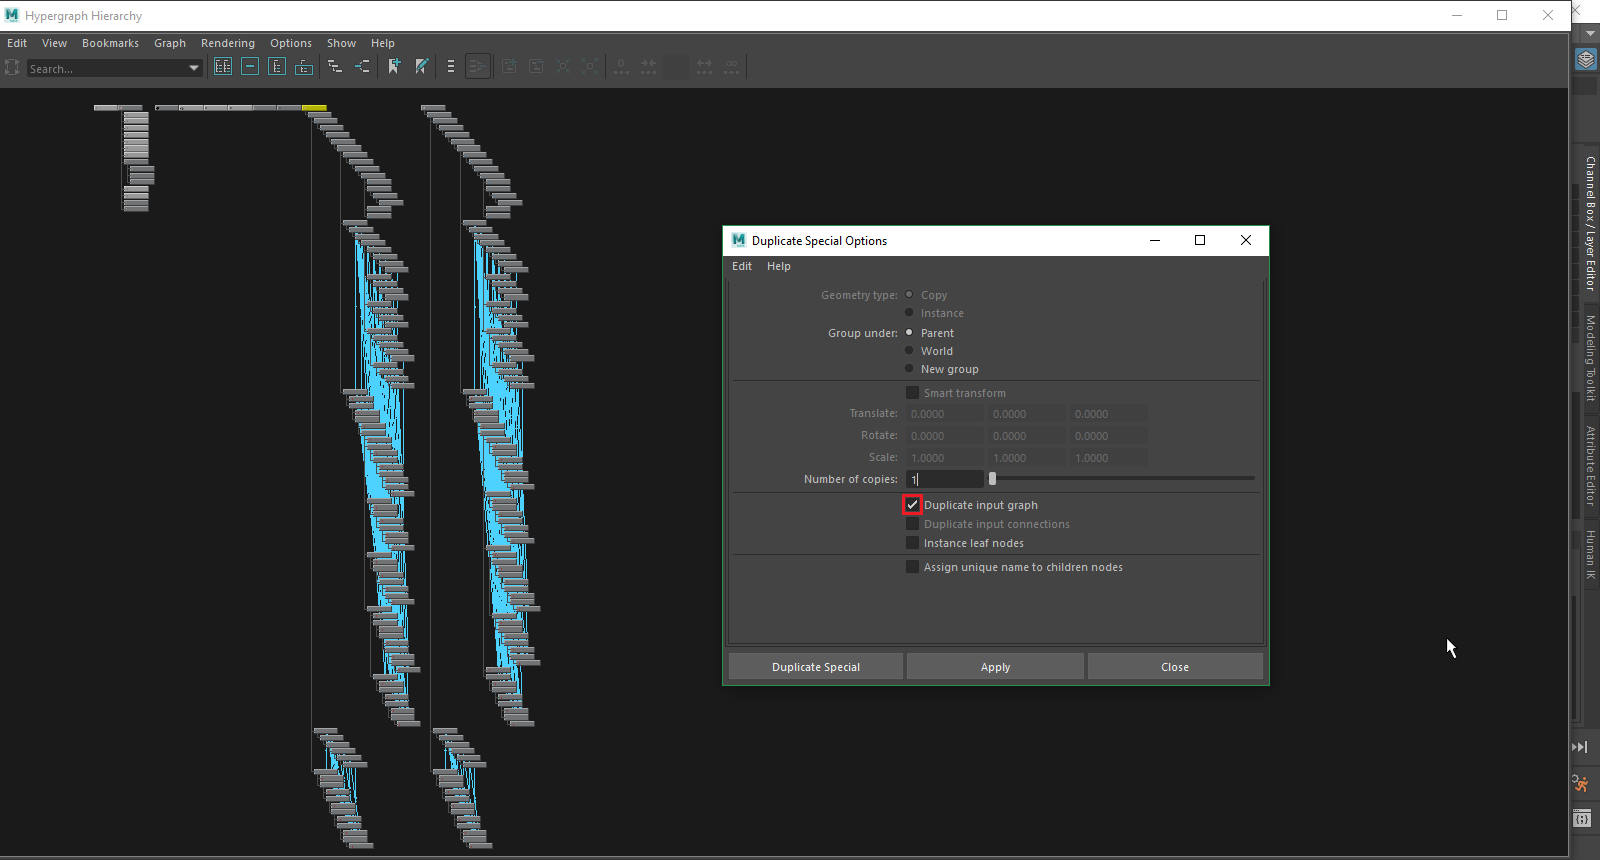
Another thing to keep in mind when using Joint Symmetry is that when you duplicate the hierarchy of your joints (e.g. when creating your controls), you need to use Edit > Duplicate Special > Duplicate input graph if you want the duplicated hierarchy to also have symmetry. Otherwise, the joint symmetry will be lost on the new skeleton (the duplicated symmetryConstraints will have all their values stripped).
You can see the missing connections in Windows > General Editors > Hypergraph: Hierarchy, and turn on Options > Display > Constraint Connections.
With duplicated input graph (notice the blue connectors):
Without duplicated input graph:

Hopefully that helps someone!