![media.mp4_snapshot_16.32_[2015.09.27_13.14.42].jpg](https://images.squarespace-cdn.com/content/v1/55bf49b0e4b09d989749e9c3/1447556132563-HFHLNU2CPEOVWN92VMHU/media.mp4_snapshot_16.32_%5B2015.09.27_13.14.42%5D.jpg)
Third Person Animation and Character Control
When Unity 4 was released, there was very little documentation for learning how to use the new node- based Humanoid animation retargeting system - Mecanim. Using Nintendo's Zelda and Mario games as reference, I created a 17 video tutorial series that demonstrated how to build a complex camera rig and character animation controller from scratch. The final product is a versatile blueprint for any 3D adventure game.
Since releasing the tutorials online, my series has become popular on YouTube, providing the most comprehensive overview of the Mecanim animation system and adventure game camera programming. The full source code was posted on GitHub, which has since been forked over 160 times.

In the tutorial series, viewers learn how to code a third person camera controller in Unity 3D, similar to 3D Nintendo games like Zelda and Mario.
Targeting system
Shader development
A large number of my projects investigating character art shaders. For these tests, I sculpted a female character model in ZBrush and wrote a Kajiya Kay and Marschner hair shader (based on this AMD whitepaper) and parallax eye shader in Unity, testing the results on my model and uploading the results to YouTube.
Hair shader
In this comparison, you can see the default Diffuse Transparent Unity shader compared with my custom lighting model. The advantage of this technique is that you avoid many of the sorting errors seen with typical transparent shaders by rendering in multiple passes, which allows for alpha blending on just the tips of the hair where sorting error are much less noticeable.
Pass 1: render opaque parts (majority of the hair surface)
Pass 2: render transparent back-facing parts (transparent tips of the hair)
Pass 3: render transparent front-facing parts (transparent tips of the hair)
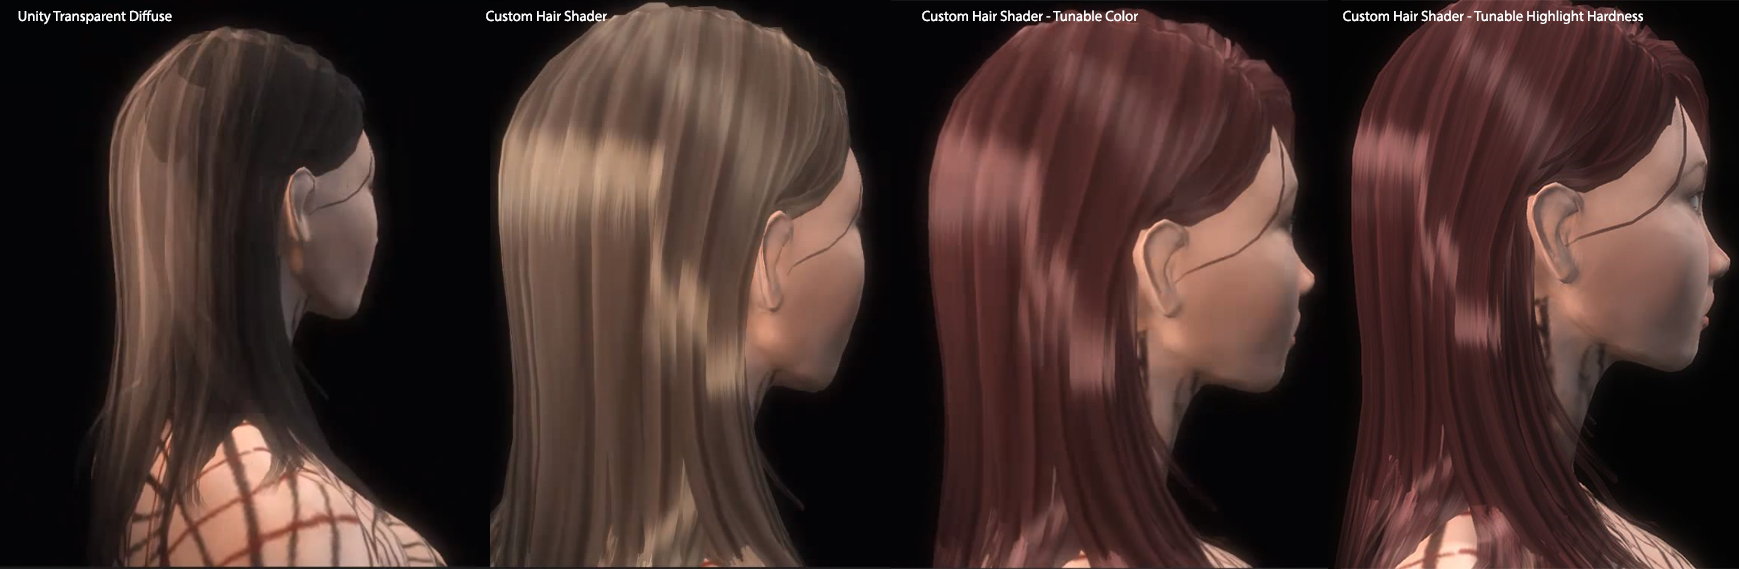
Comparison between the stock Unity shaders and my custom solution, which allows for procedural tweaking of the hardness of the anisotropic highlights and hair color

Animation comparing the differences between the stock shader and the custom solution
Eye shader
The eye shader that I created allows for several advantages over using the stock shader, and has the following features:
Parallax Offset Mapping (gives illusion of anatomically-correct concave iris)
Tuneable pupil size
Fresnel reflection
Tuneable eyelid shadows
Separate spec reflection strength for iris and scelera
Bump mapping for veins


From these screenshots taken within Unity, the effect of the Iris Parallax Offset Mapping is clear - in the screenshot taken from the side, you can see the effect most clearly. If the effect is disabled, the pupil would be perched on top of the sphere's geometry, which is anatomically incorrect. The video shown below gives a demo of the effect.


I custom painted all of the eye textures, and since they are generated procedurally in Photoshop, it was easy to create variations on the iris color. The GIF was generated from the individual Photoshop layers that constitute the final texture.
Demo video
Made for Unity 3D using ShaderLab surface shaders